Plan Your Logo for the Hat You Choose
Relia Hats develops custom hats with customer logos. Compare embroidery, printed artwork and patches, then choose a direction for the exact hat material, design size and placement you want to approve.
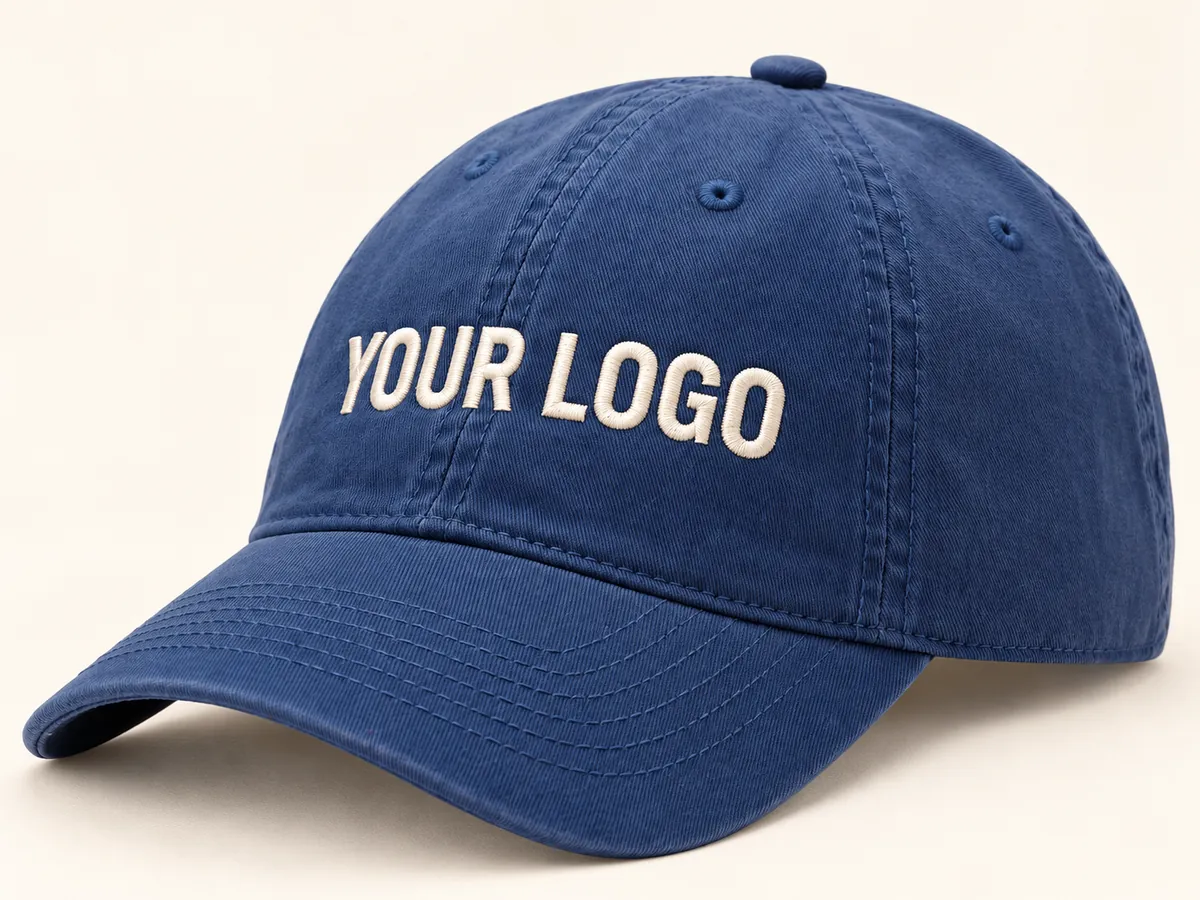
Embroidery
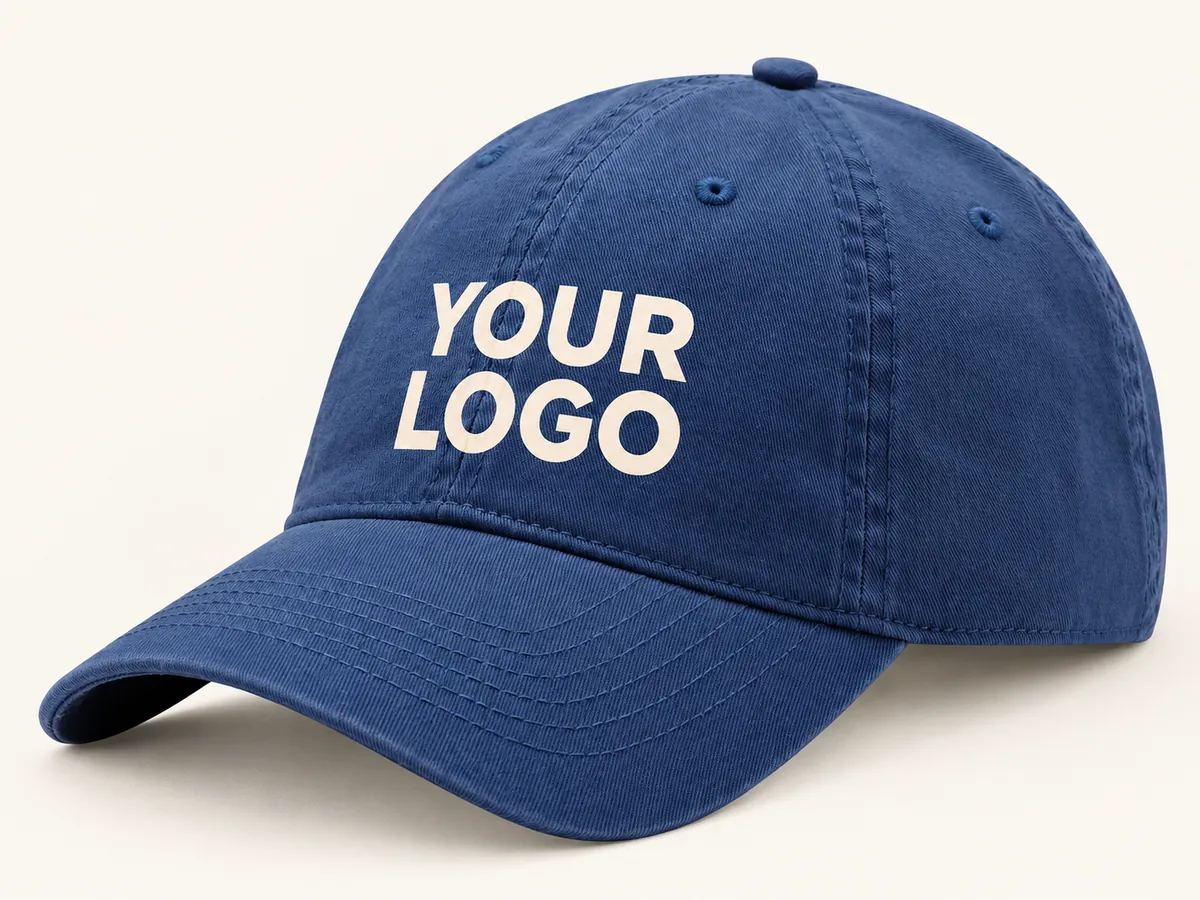
Printing
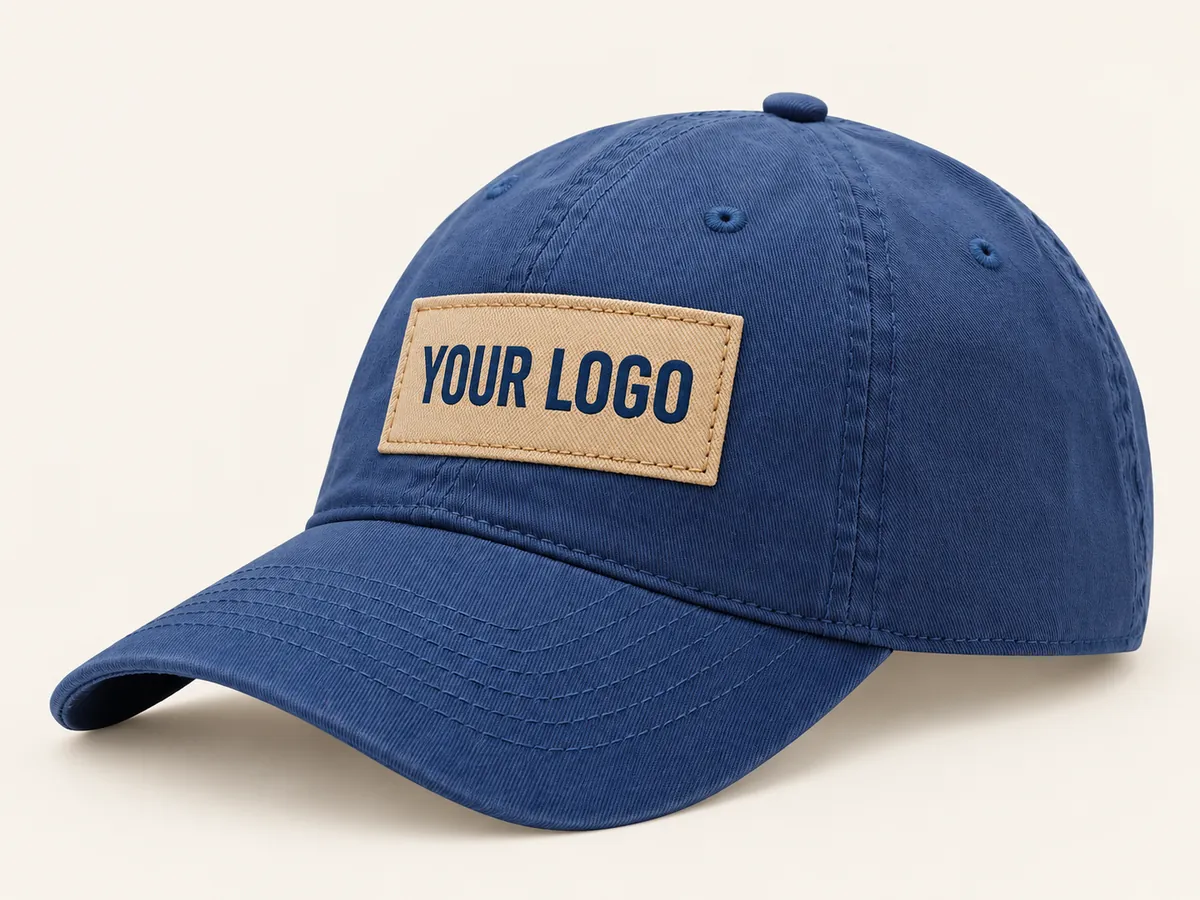
Patches
Embroidery: compare the stitched appearance at actual size
Start with the logo's lettering, shapes and intended dimensions. Flat and raised embroidery are directions to compare, with the selected thread, stitch coverage, backing and cap surface reviewed together. A raised effect needs an agreed contour; it is not a substitute for checking the detail in the artwork.
Place the design on the actual panel layout. Identify seams, mesh or perforations near the proposed area, and inspect backing contact inside the cap. A logo that looks clear in a large digital file still needs review at the size it will occupy on the finished hat.
- Confirm thread colours and the intended stitched appearance.
- Set logo width, height and clearance from seams or openings.
- Review density, backing and wearer contact on the sample.
Printed artwork: approve the process and the surface together
Printing is a useful direction when your brief calls for a particular graphic treatment, colour arrangement or coverage. The catalogue includes references to screen, digital, transfer and other effects, but the applicable method must be selected for the actual fabric and artwork.
Ask for a proof that identifies the process, substrate, colours and coverage. If an embossed, puff, flock or raised-rubber effect is requested, describe the intended appearance and agree its material and application. Keep any care or durability requirement attached to the chosen process and the completed decorated hat.
Patches: treat the logo as a component
A patch needs more than an image file. Specify its material, shape, dimensions, edge finish, backing and attachment, as well as the artwork it carries. A woven patch, an embroidered patch and a rubber patch should each be described by their actual construction.
Name your preferred attachment method and ask whether it is accepted for the actual patch material, hat surface and intended use. Mark the attachment area and agree what the sample must show, including edge contact and any backing on the inside. Treat the method as confirmed only when it is included in the selected specification.
Review how the patch sits on the chosen crown or brim. Check seam clearance, edges, contact and the way the attachment follows the surface. Confirm whether the patch replaces direct decoration, accompanies another logo or forms one part of a combined design.
| Direction | Main approval focus |
|---|---|
| Direct embroidery | Thread, detail, backing, profile and panel clearance |
| Printed artwork | Chosen process, actual substrate, colour and coverage |
| Patch logo | Patch construction, edges, placement and attachment |
Locate the artwork from a clear reference point
Front, side, back and brim locations are different design decisions. Mark the proposed position on a view of the selected hat, with width, height and distances from agreed reference points such as a seam or the brim join. Specify left and right from the wearer's perspective if that distinction matters to the brief.
Look beyond the outside appearance. Check nearby panel joins, crown support, rear fastening, lining and wearer contact. For a mesh or laser-perforated design, show where the artwork and its backing should sit in relation to the openings. Avoid assuming that every position named for a catalogue reference is automatically part of the same order.
For mesh, a woven straw-style surface or textured corduroy, review the actual decorated sample rather than relying on a flat artwork preview. Check how openings, raised texture and nearby seams affect edge definition, colour coverage, backing and wearer contact. Confirm the detail at the proposed logo size on the chosen material; a successful example on one surface does not establish suitability for another.
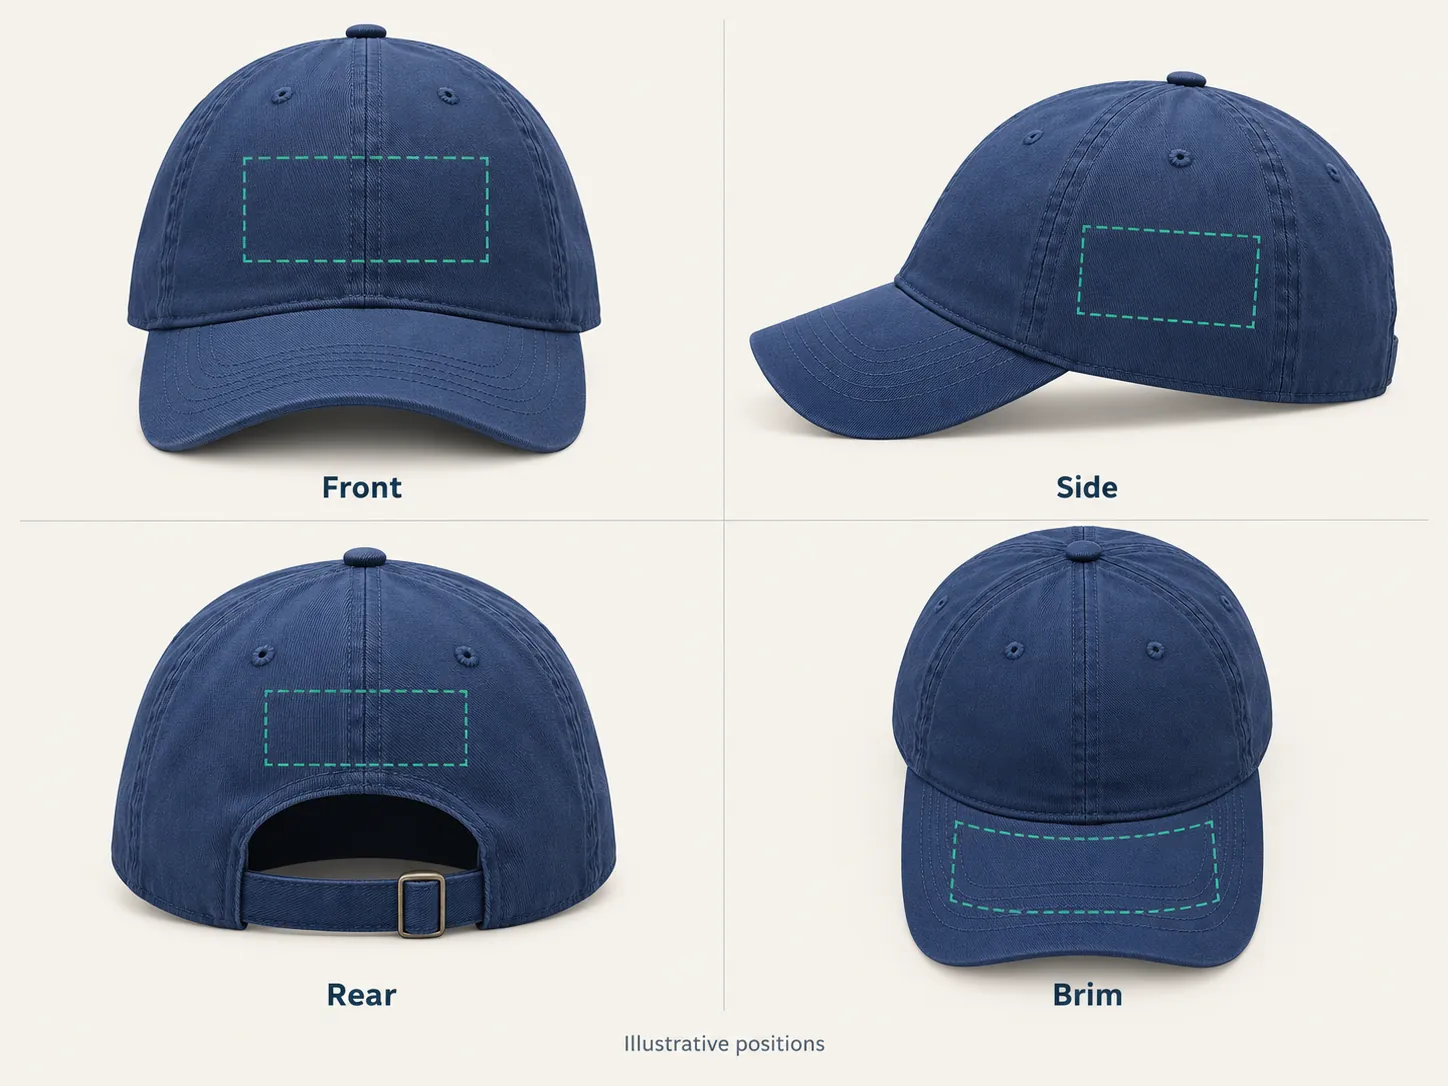
Keep one artwork version through sample sign-off
Send the current artwork file, the intended wording, colour references and actual-size dimensions. Give each revision a clear name. If a small secondary logo or a different colourway uses another version, list that version against the relevant style and quantity.
Review the full sample with the material, colour, fit, trim and logo together. Record accepted details and requested changes separately. When an artwork revision changes size, placement or construction, identify what needs to be checked again before it becomes part of the approved specification.
- Identify the artwork revision and the requested decoration direction.
- Approve dimensions, colours and placement on the selected hat surface.
- Review the complete sample, including internal backing and attachments.
- Record the accepted version and any remaining project decisions.
Send your logo with the hat direction
Start the discussion with a catalogue reference or drawing, your artwork, the required size and placement, and quantities by style and colour. Tell us the material you want to use and whether you have a preferred decoration direction or would like to compare options.
If your project calls for a blank hat without a logo, state that clearly in the brief. A blank or no-logo version is a project direction to discuss for the selected hat; it is not a promise that every catalogue item is available without decoration. Confirm which supplied components and trims remain part of the requested version.
Send a project inquiry through the contact page, or email artwork and reference files to [email protected]. The selected method, sample scope and commercial arrangements are confirmed for your project.